Monday, December 22, 2008

Master Bathroom

This posting is well overdue... but in the hopes of better late than never, I am finally posting pictures of the completed Master Bathroom renovation project! This project was the biggest and hardest that I have taken on in my new place, or well ever for that matter! It took well over a month to complete and still needs some minor finishing. I started by scraping off the popcorn ceiling, ripping out the old, broken vanity and tearing up the three previous vinyl flooring sheets. Yes, three, there were three old flooring vinyl layers each one more ugly than the previous. Once all the old was out the bathroom looked quite bare. I wish I had been able to take pictures of the blank slate I had to work with to better show you all that was done to it, but unfortunately my camera was still missing.
The next weekend was spent spackling and priming the ceiling as well as priming all the walls to really have a blank canvas to work with. Craig and I then painted the entire bathroom the same Adriatic Mist color that was leftover from my bedroom. I gave that coat of paint a week to completely dry and harden before taping 8" vertical stripes around the room. The next step was to paint every other stripe a translucent iridescent glaze in a golden glow. Since it was a glaze, the paint had a much longer drying time and required me to wait another week before painting the second coat it required.
While waiting for the stripes to dry completely, my mom and I installed 12" x 12" laminate tiles over the plywood subflooring. The tiling we used was Cryntel Italia Stone Bianco Vinyl Tile purchased at Lowe's Hardware for $1 a tile. So for about $30, the entire bathroom received brand new flooring that looks almost identical to stone tiles. The tile was a peel and stick type making it very easy to install. We installed it in a subway tile effect placing every other row half a tile off from the next. See the picture below... It was very easy to cut the tiles to size by using an exacto knife and creating templates for awkward spaces, like around the toilet.
Once all the flooring was installed and a second coat of glaze applied to the vertical stripes it was time to install the vanity!  I found the new vanity on clearance at Lowe's for $200 when it originally was $499!   Nothing was wrong or broken on this vanity, the style and color was just being discontinued.  Lucky for me, it was exactly the style I had been envisioning for the new space.  The only draw back of the vanity was that it was built to hold a two sink countertop and the top two drawers were dummy drawers.  I originally had planned to reuse my one sink countertop.  In order to create two additional functioning drawers, I measured, cut and built two drawers to fit the vanity.  I purchased 4 pullout makeup organization trays at IKEA and retrofit them under the sink area.  Lastly, I installed new hardware to the door fronts to replace two of the knobs.  I think the curve of the new hardware is a great complement to the curve in the new light fixture in the bathroom.  Finally, Craig and I maneuvered the vanity into place and secured it by using five screws into the wall studs.  
I should have seen this next thing coming, knowing my experience with thinking a project is easy and then finding out how challenging little things are with this house.  Of course the old vanity was 58" long and the new vanity 60" and therefore the old countertop 2" short... how did I not see this coming!  Unfortunately as much as I could brainstorm cheap and creative solutions, it was just ultimately easier to buy a new countertop that fit perfectly.  So off to Home Depot we went and then in the new countertop went.  The finishing touches were installing a new light fixture (matches the one downstairs), the brush nickel faucet, and matching bathroom hardware.  
The trim around the vanity was cut back and new corner round cut to size and installed.  Each of those received a fresh coat of white trim paint as well as the door.  The door was also updated with a brush nickel doorknob.  Would you expect anything different from me? ;)  I love having all the hardware match through out the house.  And let's not forget the new stark white light switch and outlet. 

See... wasn't this posting worth the wait? :)

Monday, November 17, 2008

Master Bathroom Progress...

hello all! I am currently working on renovating the master bathroom. The biggest project yet! Hence the lapse in blog postings. So far, the old broken vanity has been ripped out, popcorn ceiling removed, and the old peeling vinyl flooring ripped up. Demo was fun until I had to clean it up all up. After cleaning the room, the ceiling received a fresh coat of white paint and the walls the same Adriatic Mist paint from the bedroom. Last weekend, my mom and I installed new laminate floor tiles that look almost real but cost nothing near. Currently I am in the process of painting vertical stripes on the walls to add to the luxurious feel. No pictures to post as of yet, since my camera was lost somehow at the NC State game. I hope to borrow a camera in the next few weeks to take pictures and show off the fab work! So I will continue to spend all my free time in the bathroom in hopes of posting results soon!


p.s. I also would like to give dap to Craig for all his hard work & great disposition while helping me with this project! :)

Thursday, October 16, 2008

Half Bath... Fully Done!


I am happy to write that the downstairs half bathroom is finally finished! After one coat of primer, two coats of an awful traffic cone orange color, two more coats of a deeper red paint, then another coat of primer, and finally two coats of chocolate brown, I am ecstatic to say that I will not be painting this bathroom ever again!! :) A lot has changed in this small space so I am posting the before and after pictures for comparisons. Below is the vanity with a fresh coat of white paint, new hardware, and a new fixture. I also switched out the towel bar with a small towel ring, replaced the dated light fixture, and installed a new mirror with a white border.

On the opposite wall a casual picture frame featuring red coral and tan graphic designs was hung above the toilet. I also updated the toilet paper holder to match the new towel ring and the satin nickel of the sink faucet. Of course, one could not forget the beautiful and rich laminate hardware flooring that makes a huge difference in the small room. The door and trim received a fresh coat of paint and an updated satin nickel doorknob.

Last but certainly not least... I took the time to scrape off the old popcorn ceiling, putty and sand the surface smooth before applying a fresh coat of paint. I don't have a before picture of this but I am sure everyone knows a popcorn ceiling when they see one and they won't see it in the half bathroom. Now for the rest of my house... that's a different story and likely to not change because removing popcorn is hard and dirty work! I am really excited about the transformation in this small bathroom and I think it feels really cozy yet contemporary. Many where afraid the dark color on the wall would make the space feel like a cave and fortunately it does not! Many visitors will also be happy to know that the door is back in place for their privacy. Overall this project took much longer and much more paint that originally expected but the end result is always worth the work. At least that is my perspective. ;)

Thursday, September 25, 2008

The Dining Room Rug is Here to Stay!

Just wanted to post another picture of the dining room:


I have framed two pictures with custom dark brown picture mats (handmade by yours truly, of course... wasn't about to pay $35 for just one mat!) the pictures are of Craig & I and of my fab girlies Betsy, Carrie, and I. I will hang two additional pictures above the desk to make the long wall symmetrical. Still deciding on the particular pictures but I know I want great pics of my family and other loves!

Oh and "Papa don't preach... but, I've made up my mind... I'm keeeeping the ruuugg!" ;) wow, so corny. But I do love the rug - it's so soft and works just perfectly in the space. yay! Props to my beautiful Mom on that one.

Sunday, September 21, 2008

Dining Room Rug with Green?

So, I have decided that the dining room needs an area rug to define the space from the rest of the living room and the desk area. On a Lowe's Hardware trip with my mom, we found a great rug on sale for half off! I love the rug and it's the perfect size; I am just not sure the green in the rug or the modern curves match with the rest of the living room. A picture is posted below, comments appreciated! :)

Thursday, September 4, 2008

Breakfast Nook with a Side of Blinds

This post is dedicated to my girlie Betsy. Many thanks to her for getting me a sweet employee discount on the Levolor (a Rubbermaid company) ;) blinds pictured to the left. Before, the kitchen was like a 24 hour human exhibit tank with me as the main attraction whenever I was in it. However, the custom blinds came today and with my Mom's help we installed them to my delight! Paired with the cute bar table and chairs from IKEA the breakfast nook is ready for it's first Saturday morning pancakes. I also must give shout outs to Craig for helping assemble the table... they don't make constructing these things easy!! It all looks great though and I can't wait to enjoy the view of the trees over the top of the blinds and a cup of coffee at the table with no outside spectators. :) happiness.

Wednesday, July 30, 2008

Loving my Living Room

I know it has been a while since I have posted on my blog. I have just been busy busy cleaning, painting, and putting away things at my new place. Now after a full month of living at my first place, I am happy to post some progress! I have made my first mortgage and HOA payments...yay.... sorta. ;) Many payments to go, but yet the place already feels all my own. I have worked almost solely on my living room this month to get it looking how I want it. That way, even if the rest of the house is a hazard zone, I can still relax in my living room. Let me know what you think and any design suggestions or tips are welcomed!

Wednesday, June 18, 2008

A Latte New Latte Hardwood Floors

The new laminate hardwood floors have been installed and they look gorgeous! :) The guys that installed them came early Wednesday morning and finished up just before 6pm that same day. They were very friendly and their detailed-oriented work effort really shows. Anyone looking for new flooring and wanting a recommendation, let me know and I will gladly pass on the name. Here are a few more pictures of the rest of the first floor with the all new flooring:

The kitchen looks dramatically different with the hardwood extended into the whole area and replacing the previous laminate tiles.

Sunday, June 15, 2008

Sunday's Helpers

On Sunday, we decided to take on the daunting task of painting the oh so tall stairs and hallway walls. Lucky for me, Jimmy was there to help along with the lovely trio: Carrie, Loren, and my mom! Here are a few pictures from that afternoon...

Saturday, June 14, 2008

Gobi Desert.

Progress is being made!

My place is finally starting to look better. They always say that things have to look worse before they look better and that's definitely true for our work. We started by taking things off the wall and painting the not so pretty primer everywhere and now that some color is up, the unit is looking great!

Saturday was a long work day for my mom, Craig, and I. We started at 10:30 that morning and didn't stop until after 6pm. Although it was a long and tiring day, so much was done and you can really see all the transformations taking shape. I couldn't have done it without their help, so I am very grateful that Craig and my mom devoted their day to helping me. :) We put on some music, made jokes about Gobi Desert, Balmy Seas, and who is the lucky one that gets to name the paints, and the next thing we knew it was already 6pm.
Adam and Jen stopped by to visit and take in the progress and later that day Betsy came by too! In the middle of all the visitors and painting being done, I had an appointment with the flooring guy to quote new flooring. 3 hours later and much negotiation, I decided on new carpet upstairs in Natural plush and laminate hardwood downstairs in a Latte Oak. (Again, loved the name.) The floors will go in Wednesday and Thursday... pictures, of course, to follow! Can't wait!

Friday, June 13, 2008

Let the Work Begin...

On Wednesday night, my mom and I begun work on my place. Kristin and her boyfriend, Alex, stopped by to lend a helping hand too. The walls were scrubbed clean, primer rolled on to the first of many walls, and all valances taken down. I was happy to see them go. :) I also was determined to see the chair molding taken down. Thinking this would be a simple prying of a few nails. Not likely, the previous owners had used massive amounts of glue to apply the chair railing and in the end, Alex ripped it off the wall taking a bit of the wall with it and leaving the old wallpaper underneath.

Thursday, June 12, 2008

Before Pictures

Here are the much requested pictures of my new place (let's just call them "before" pictures) ...

living room:

dining room:

kitchen:

open floor plan:

downstairs half bathroom:

stairs to second floor:

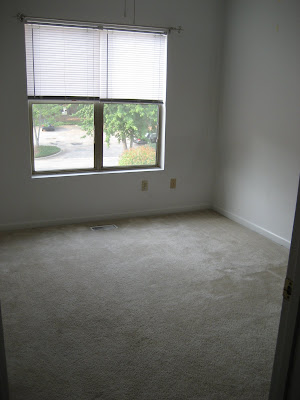
bedroom one:

bedroom one's bathroom:

bedroom two (aka master bedroom):

master bathroom with garden tub:

walk-in closet:

hallway between the bedrooms (the laundry):


comments welcome on any suggestions for updates or color choices! :)

Wednesday, June 11, 2008

Closing Day

I closed yesterday!! After signing my life away and my name about 1001 times, I finally closed on my condo. :) And no, you don't feel like a famous actress signing autographs at a movie premiere... just in case you were wondering. But it was good, everything went so smoothly and at the end I was given the keys... the keys to my new chapter.

I couldn't wait. I went over to my new home almost immediately to show it off and then again later that day to start the work. Whenever I show people around the unit, I always feel the need to say, "It needs a lot of work, so use your imagination." I sure have. In the 30 days between first walking through the unit with my Realtor, Mariella, my mom and younger sister, Kristin, and up to yesterday when I finally closed, I imagined all the things I would love to do with the place. Built in 1990, the condo is not really outdated like some other places I looked at in my house search, but it could definitely use some freshing up. The unit was also rented recently and shows the wear of its previous owner. Dirty carpet, scuffs on the walls, and remaining tape from posters let you know it had been lived in and loved before me.

My first task will be to deep clean and paint the entire unit. I think just doing this will show a great improvement and make it feel clean as new. I plan to go over tonight, to start the nail hole patching and wall cleaning.... I will post "before" pictures as well for all those that are curious and to compare to as work is done!